I you would have shared a dummy copy of your problem, I could have worked in that.
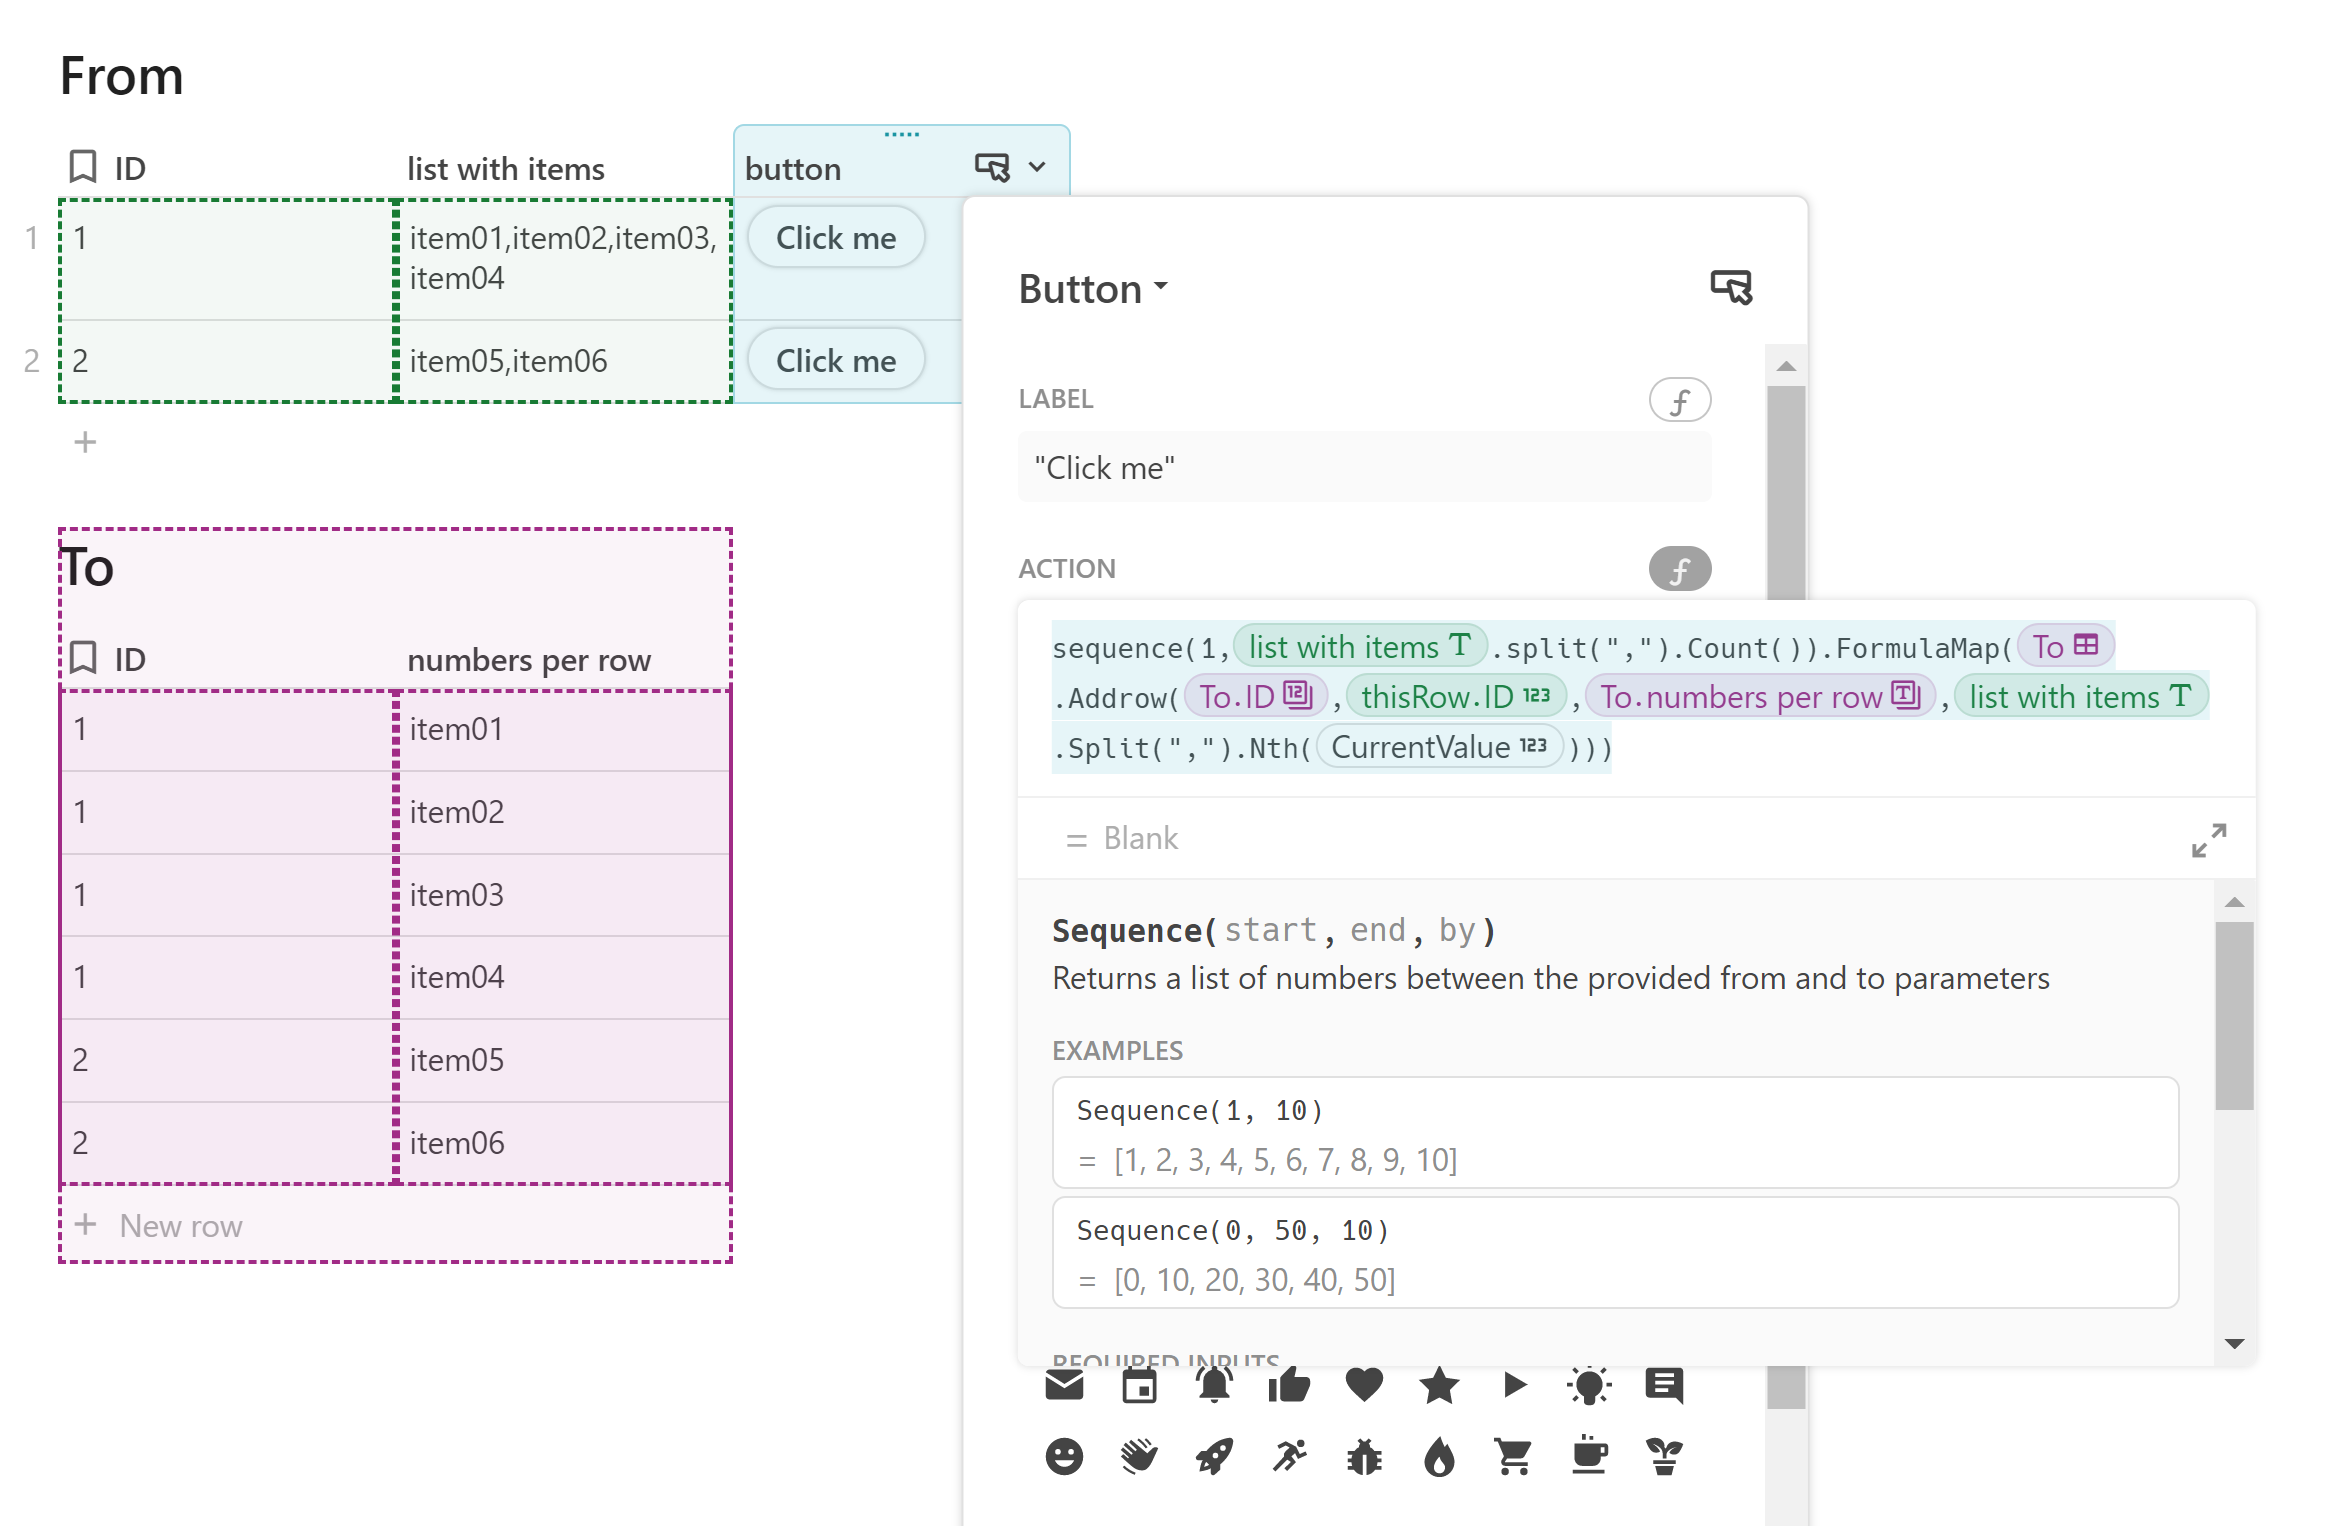
See below what I created, we count the number of items in the list and create as many rows as we count items (4 in the first row, 2 in the second row).
Sequence(1,thisRow.[list with items].split(",").Count()).FormulaMap(To.Addrow(To.ID,thisRow.ID,To.[numbers per row],thisRow.[list with items].Split(",").Nth(CurrentValue)))
Hey Christiaan, thanks so much for your reply! It works well when I use the two items columns you put, if I try to add in other fields, such as SKU or Quantity, it causes the other columns not to split? What am I missing?
it is not easy to see from screenshots what might cause the trouble.
When asking the community for help on something like this its always better if you create a sample document that you can share and show us what the problem is and where … with tables, schemata, formulas there is so much detail its easy to spend a lot of effort chasing the wrong thing.
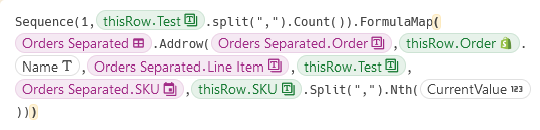
Anyway, I tried to recreate your problem and solved it by adding split() as you can see on the screenshot below.
Thanks again for coming back to me! I’m not sure what I’m doing wrong, as far as I can tell I’ve written it just like you have. I’ve created a dummy spreadsheet now (apologies for not doing that first)
What I did it checking the columns to see how many items they contained and most of them only 1 instead of the 10 you see To keep it simple I duplicated each column and created a split version (could also be done in the code in the button, but as such you see better what happens). In the button I refer to this split version.
I have the same issue but I think I am much more of a novice. I am not understanding how the “Order Number” Column is created. I have the “Order” column from shopify.
We have been manually entering in orders in to a spreadsheet. This linking with shopify will save us so much time. I am excited to figure this out but am at a very basic level of understanding
hi @Aaron_Chupp , welcome! And it is very much understandable that the provided solution feels overwhelming for you. Once you share a sample doc we can look into and edit, we have a better chance of succeeding. In the example Nikki got her data from Shopify in a table and we distributed the data over rows.
We have linked to our Shopify account using the Shopify Pack.
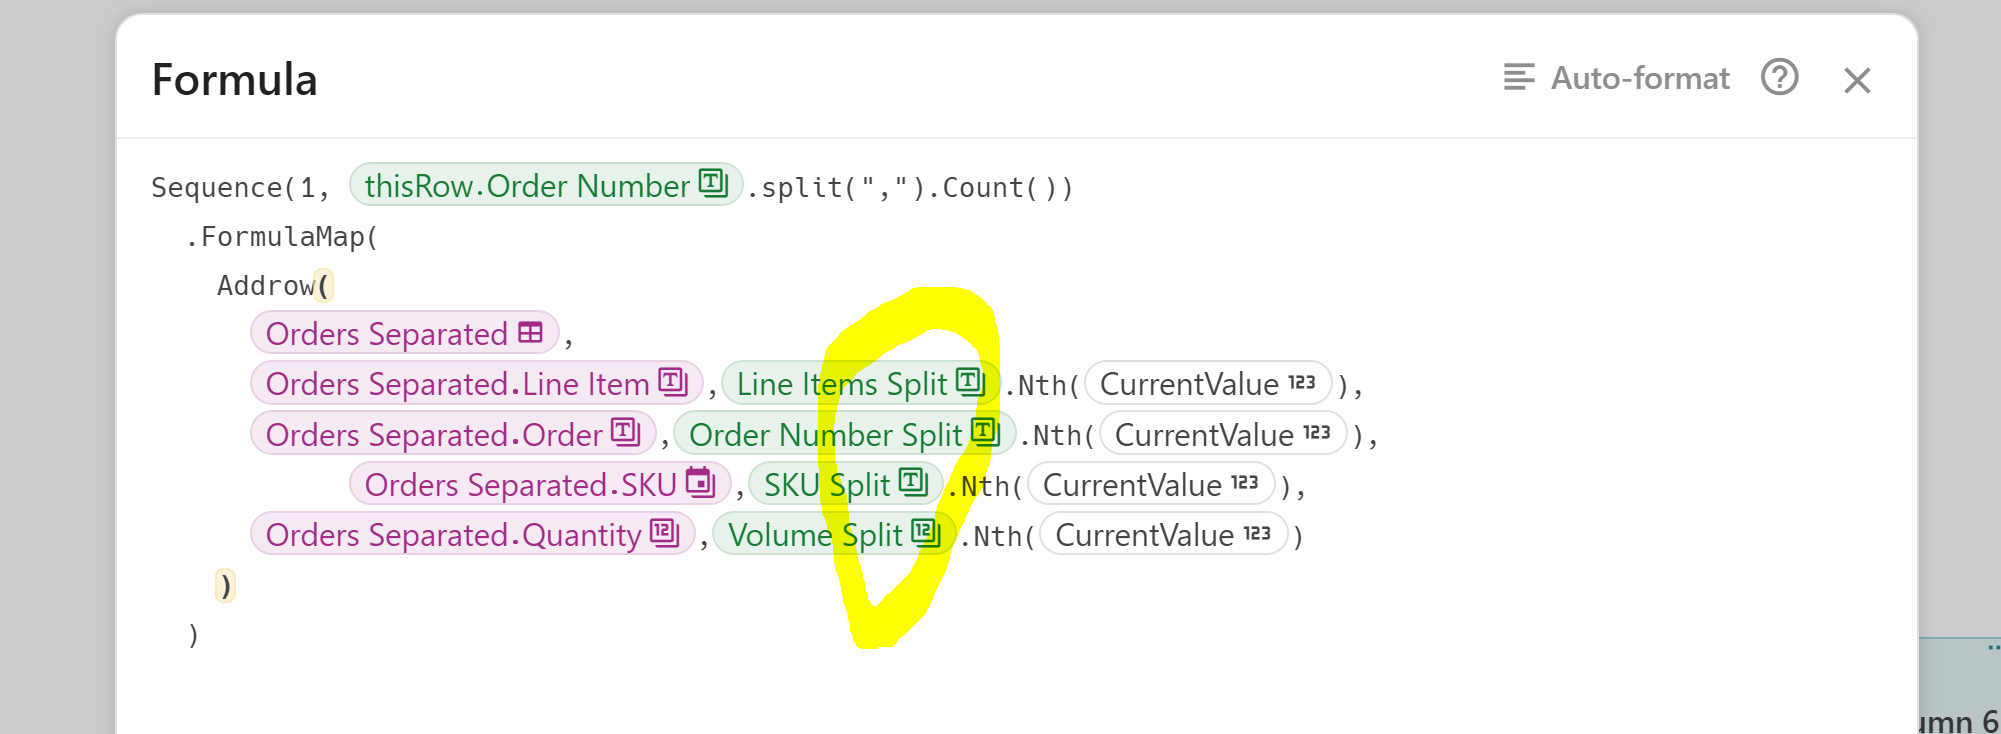
For each Order we have Line Items. I need to split the order into individual rows for each line item and then input all the data from the Line Item into a new column. As you can see from the picture each Line Item has more data than just the title as there are attributes that the customer inputs.
I understand that you need a sample table to look at but I am not sure how to make that.
this is very much the same challenge as @Nikki_Donkin faced and the solution you see a bit higher.
you add a button in your table and you create a second table: ‘target table’ and this second table is filled out with the rows that contain the order id and the item, see the post of May 21.
Cheers, Christiaan
I was unable to create a sample doc, with the Shopify data linked. This is a sample doc, that I backwards created to show what I think the data is stored as.
If I can split this data in this form I think it might work on the shopify data.
Thank you Christiaan. I am possibly one step closer, but it isn’t completely working yet.
The embeded photo shows that when the when the row splits, the “ID” for the Line Item is populated into the column. The next step I need is to have all the data that is associated with that ID from Shopify to be populated into another column in the Helper Table.
The goal is to take each order, split it into a row for each part of the order for us to track the various parts as it goes through our production process.
If I click on the ID in Line Items the pop window shows all the data I need populated into a column. Does this make sense? Let me know if you have any ideas on this.
However if you want to go even further and split the info living in the ‘Parts’ column and relate it to the order id, you have to write a script for this. This kind of work is outside the scope of the community support.
Thank you Christiaan! I think I am going to have hire someone to help with this. From reading a little bit on your profile, I saw that you don’t do that type of consulting anymore. Can you point me in the direction of someone I could hire to help with this?
I am not sure if I understood your request correctly, but I tried it anyways I made the changes in the sample doc you provided in your Sample Doc
Based off on @Christiaan_Huizer solution to your issue, I added one more step. In the original table (that is, not the helper table), I added a column that connects the Line Items to the “Line Item Data”.
That way, when you then click the Button that Christiaan has set up for you, all Line Items will be distributed one per row, and each newly added row will state the corresponding line item as well.
Thank you everyone for all the ideas and assistance. Through the process I have realized my ultimate goal is something that I am not going to get on my own through the community and have instead posted a gig request in a separate post.
Hi @Christiaan_Huizer ,
I’ve tried everything mentioned in this thread. I want to achieve exactly what is suggested here, but I just can’t get it right.
My use case: I take meeting notes and have multiple action items in one cell. I then want to have a button in that row that adds these action items as separate rows in a new table. I have created this doc to test it out.
Any help would be very much appreciated!! When I try to copy the formula already provided here I am failing at the “Addrow” step and I can’t figure out how to get it right.
Thank you!