We recognize that you have a lot of options to manage projects, take notes, and collaborate with your team. And before you decide on one of them, you’ll want to try on a tool for size. Usually that means painstakingly copy/pasting data into a new construct if you choose to migrate to a new tool. If you thought you’d have to spend your afternoon copy/pasting every Notion page into a Coda doc—I have good news!
Today I’m excited to announce the launch of our Notion importer.
During testing, we saw people use this importer for a number of use cases including:
- Translating a doc into Coda to be published to the Doc Gallery
- Unifying templates into one system in Coda
- Unlocking the power of Packs and the Coda API to super power docs that used to live only in one ecosystem
If you’d like to move your work from Notion into Coda, simply export your Notion page(s) or workspace as HTML, and import them directly to Coda. We’ll do our best to maintain formatting, information hierarchy, references to people & pages, column formats, and lookups so that you can keep making great solutions in Coda. We’ll even translate your cover photos and page icons when possible!
Want help translating common Notion Patterns to Coda? The incredible Ben Parker has you covered with his handy Notion User’s Guide to Coda: https://coda.io/@ben-parker/the-notion-users-guide-to-coda

Here’s step-by-step instructions for how to export your data from Notion to prepare it to be imported:
 Tip : If you use Safari, update your General Settings so that the “Open ‘safe’ files after downloading” option is unchecked before you get started . Otherwise, Safari will automatically unzip your Notion export, which will hinder you from importing to Coda.
- Select your top-level page (which will include its subpages)
- Click the 3 dot menu in the upper right corner
- Select Export
-
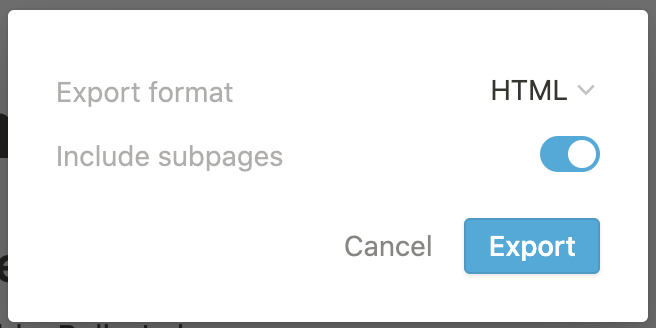
From the export menu, select your format as HMTL
-
Indicate whether you’d like to include subpages or not.
 Tip: We recommend including subpages, as all tables in Notion rely on data from subpages. Exporting without these will prevent your tables from importing to Coda.

- This will export your work as a zipped file, and download it to your browser; you’ll also get an email with the download link
Once you have your export, you can import the file into Coda as a new doc, or from an existing doc.
For a new doc:
- Navigate to your doc list at coda.io/docs
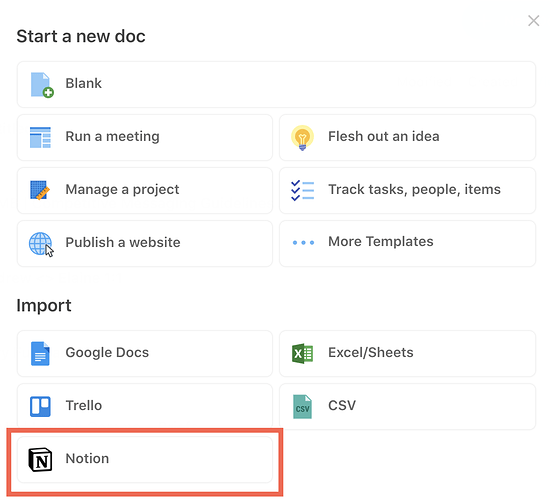
- Click the + New Doc button
- Select Notion
- Click the Select file button
- Choose your zipped file, and click Open
If you’d like to import content into an existing doc using the Explore Panel, follow these steps:
- Click the Explore text in the upper right corner of your doc
- Search for “Notion,” and click the option that appears under “Import”
- Click the Select file button
- Choose your zipped file, and click Open
If you’d like to import content into an existing doc using the / command, follow these steps:
- Type /notion anywhere on your page
- Select the “Notion” option for import
- Click the Select file button
- Choose your zipped file, and click Open
Some things to know before you go:
- We thought announcing our v1 API this summer might inspire our friends at Notion to finally launch their API, but alas, we’re still waiting. Don’t worry ー we’re keeping an eye on if/when an API-supported import method might be available. For now, given restrictions, the HTML export is the best option for overall import fidelity.
- HTML exports do not support formulas, filtering, and alternative database views, so they won’t come through “as is” in your imports to Coda; however, Coda will retain the values and data, allowing you to apply new formulas or filters after importing.
- Share your doc (even if it’s blank!) with the referenced people before importing so that you can retain @-references from your export
Thanks for your continued feedback for how we can make Coda a stronger solution for your teams. We hope this helps unify more of your information, more easily!


 !!!
!!!


